
Step-by-Step Guide: How to deploy MQTT broker using eclipse mosquitto on Amazon ECS
Introduction
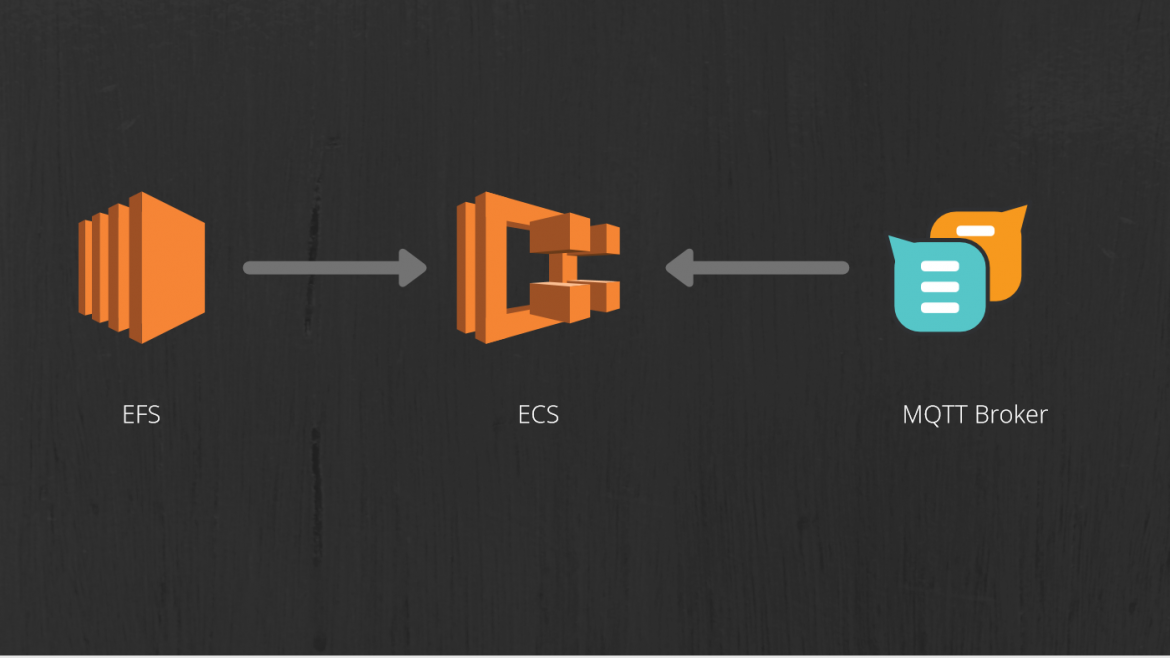
In the world of the Internet of Things (IoT), communication between devices is essential. MQTT (Message Queuing Telemetry Transport) has emerged as a lightweight and efficient protocol for transmitting data between devices. Eclipse Mosquitto is a widely-used open-source MQTT broker that provides the infrastructure for publishing and subscribing to messages. In this blog post, we will guide you through the process of deploying Eclipse Mosquitto MQTT Broker on Amazon EC2 Container Service (ECS), a scalable container orchestration platform offered by Amazon Web Services (AWS).
Prerequisites
Before we begin, make sure you have the following prerequisites in place:
- An AWS account with appropriate permissions to create and manage resources.
- Familiarity with AWS services, particularly Amazon EC2 Container Service (ECS).
- A basic understanding of Docker and containerization concepts.
- Knowledge of MQTT and its usage in IoT applications.
Deployment
Step 1 - Set Up an ECS Cluster
- Log in to the AWS Management Console and navigate to the ECS service.
- Under ECS select create cluster where you want to deploy your MQTT Broker
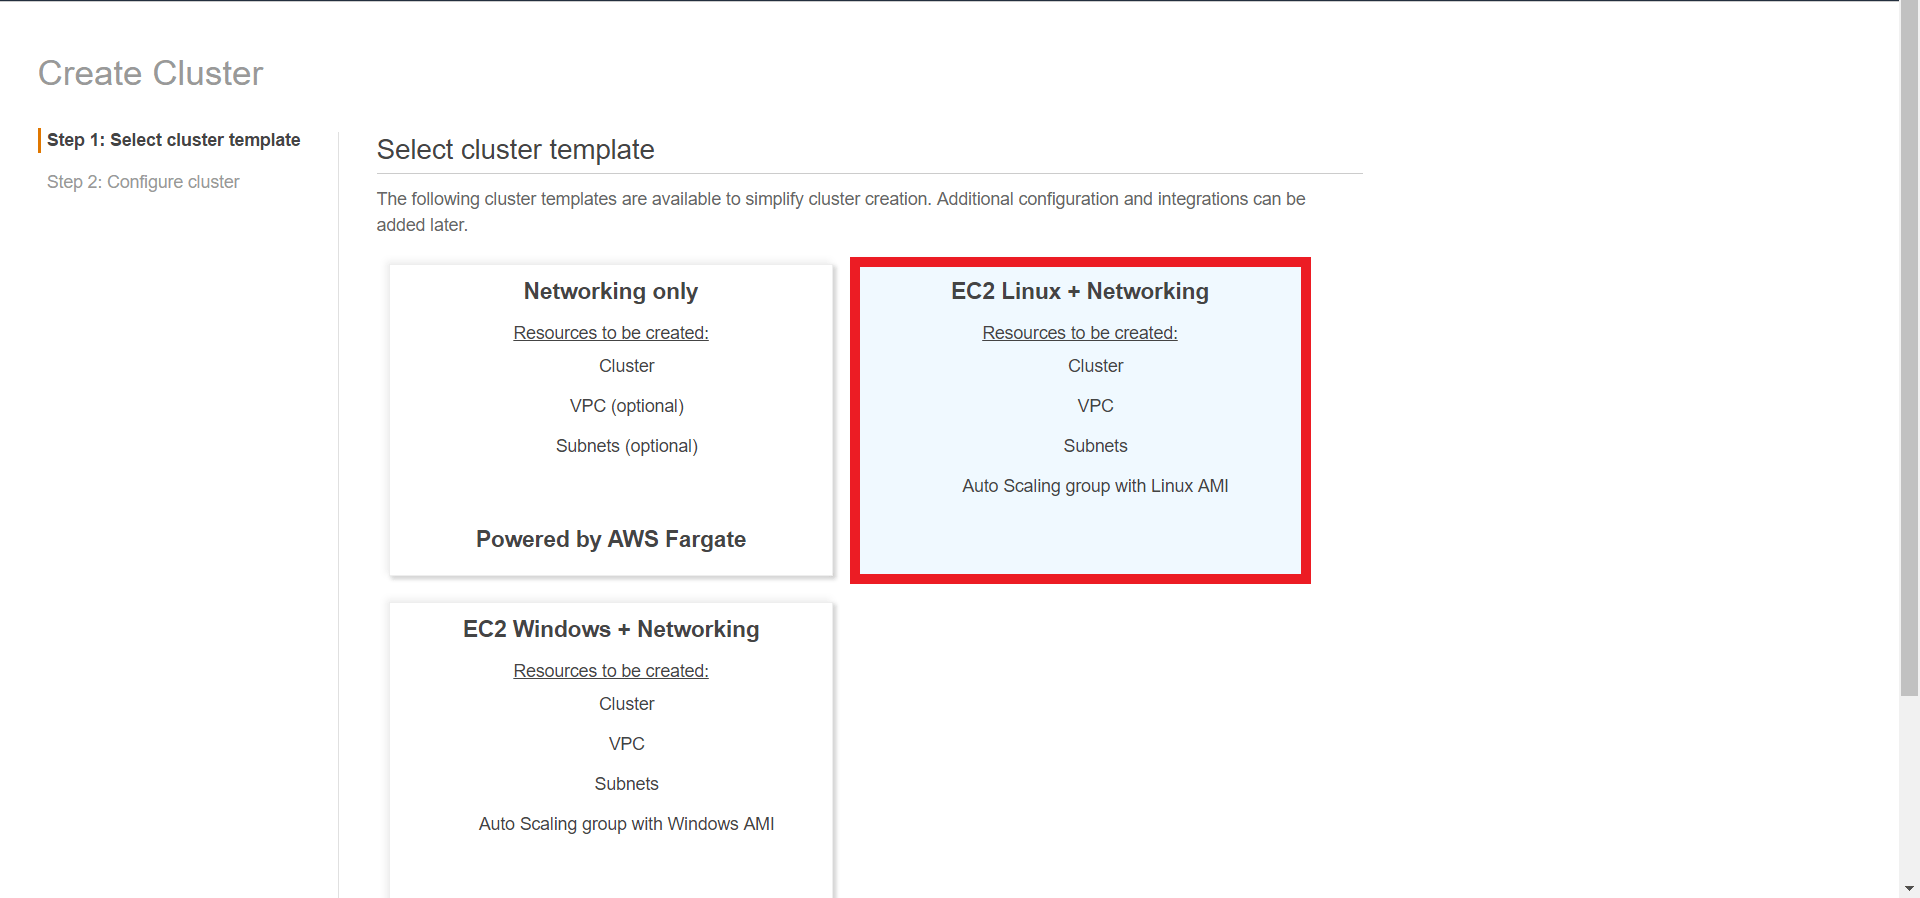
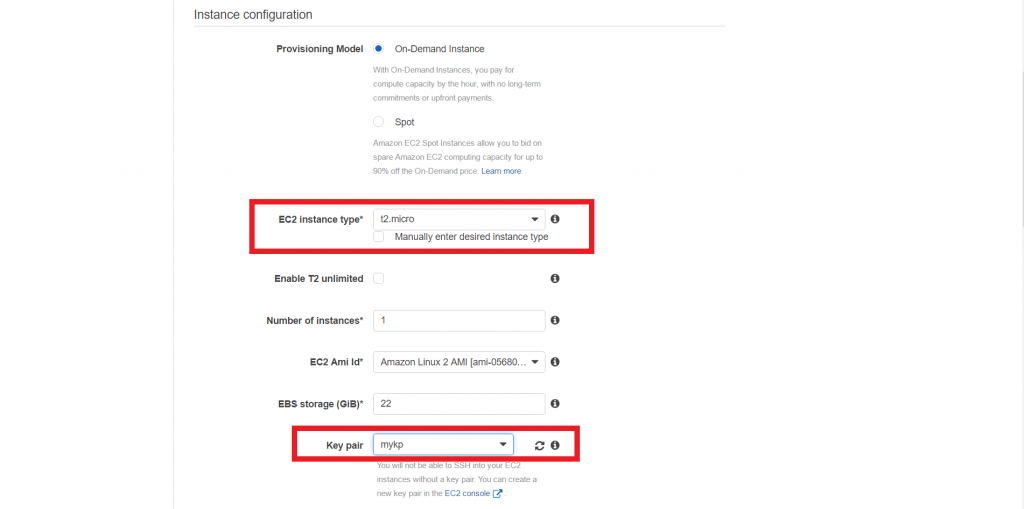
- In cluster configuration choose an EC2 instance key pair (since we would need to ssh into our EC2 instance later on) and an EC2 instance type and hit create
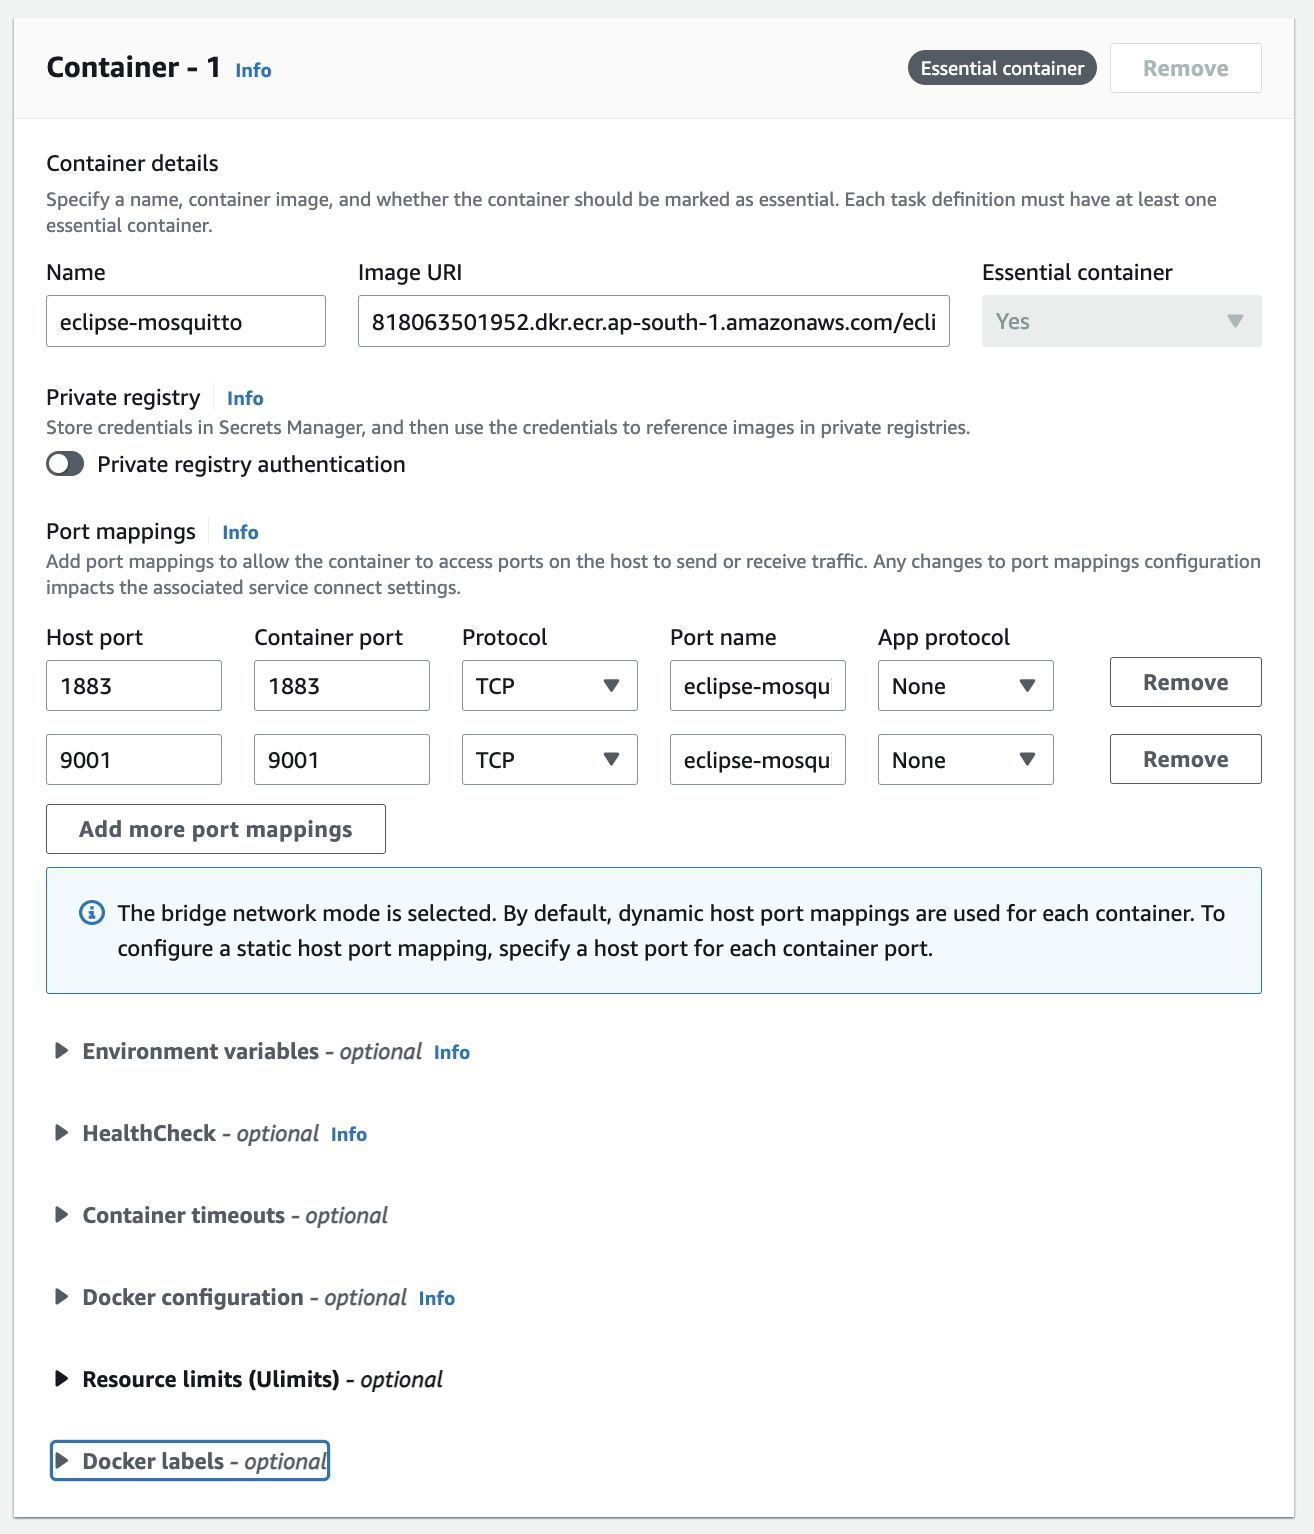
Step 2 - Create an ECS Task Definition
- In the ECS console, navigate to "Task Definitions" and click on "Create new Task Definition."
- Provide a name for the task definition as "eclipse_mosquitto" or any name of your choice

- Define the container details. For Eclipse Mosquitto, use the official Mosquitto Docker image (e.g., "eclipse-mosquitto:latest"). but do not use it as it is since it will limit the number of times you can pull etc in a prodduction deployment. You can copy the same from docker hub to ECR and use the ECR image instead.
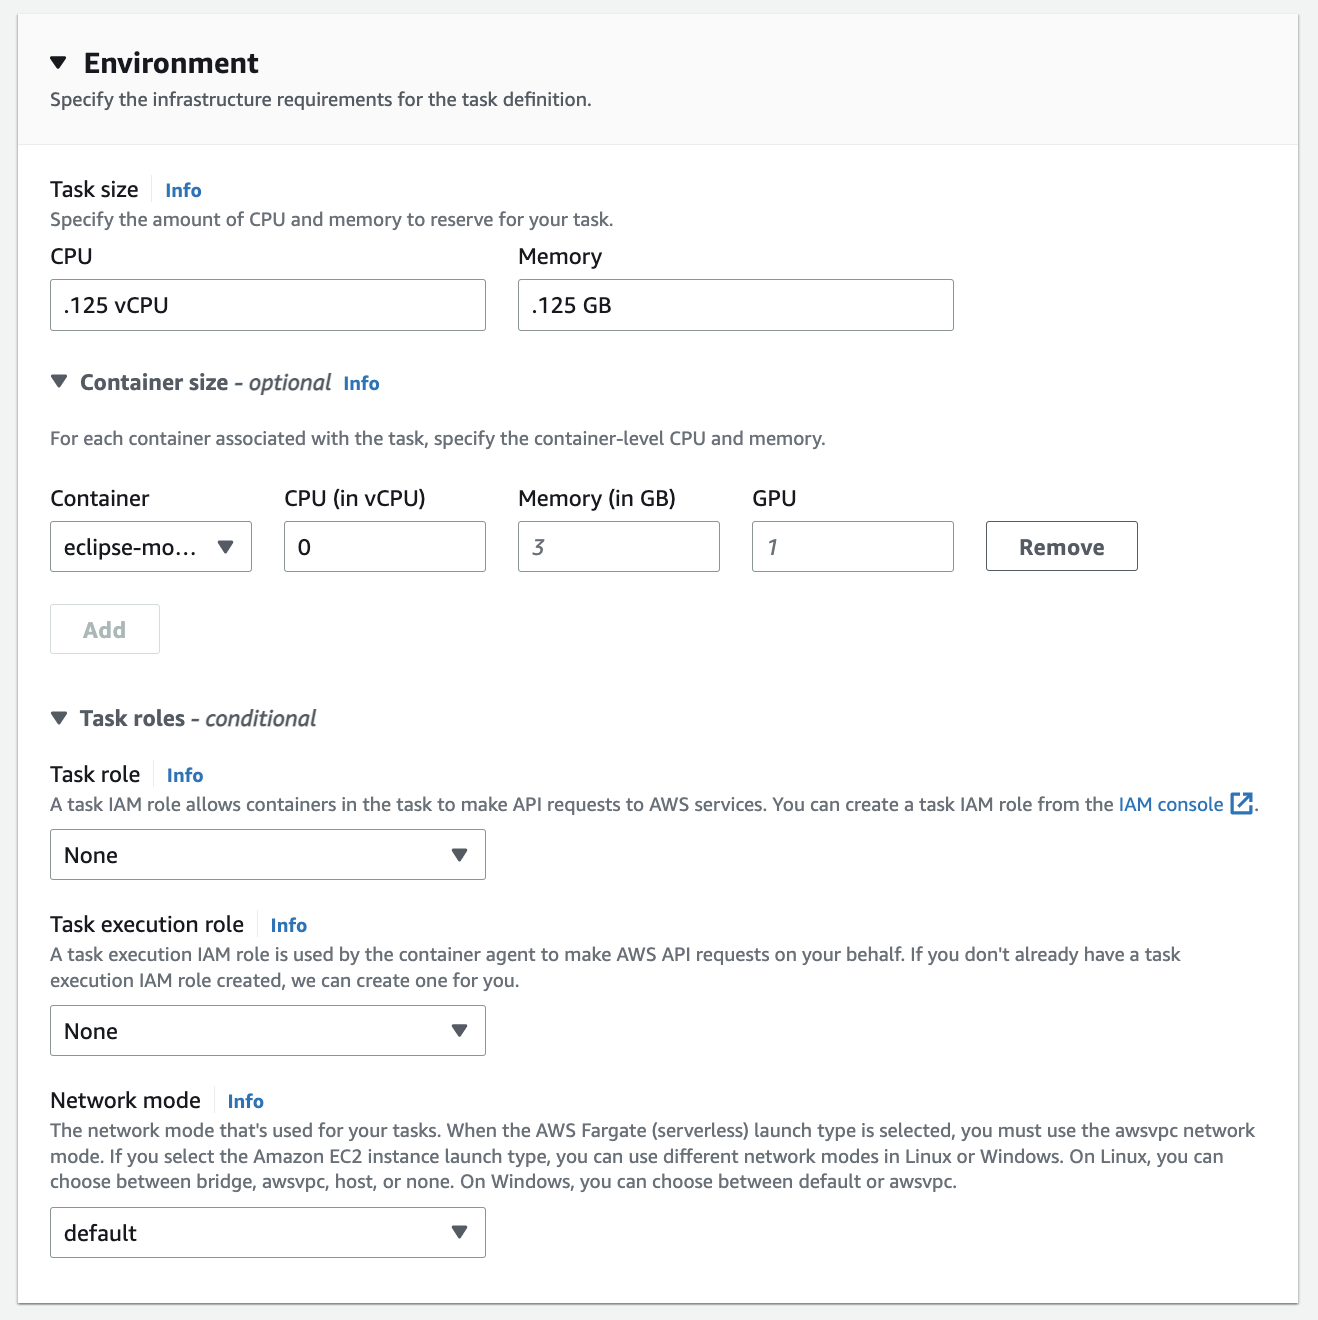
- Specify the resources like memory, CPU and task IAM role.
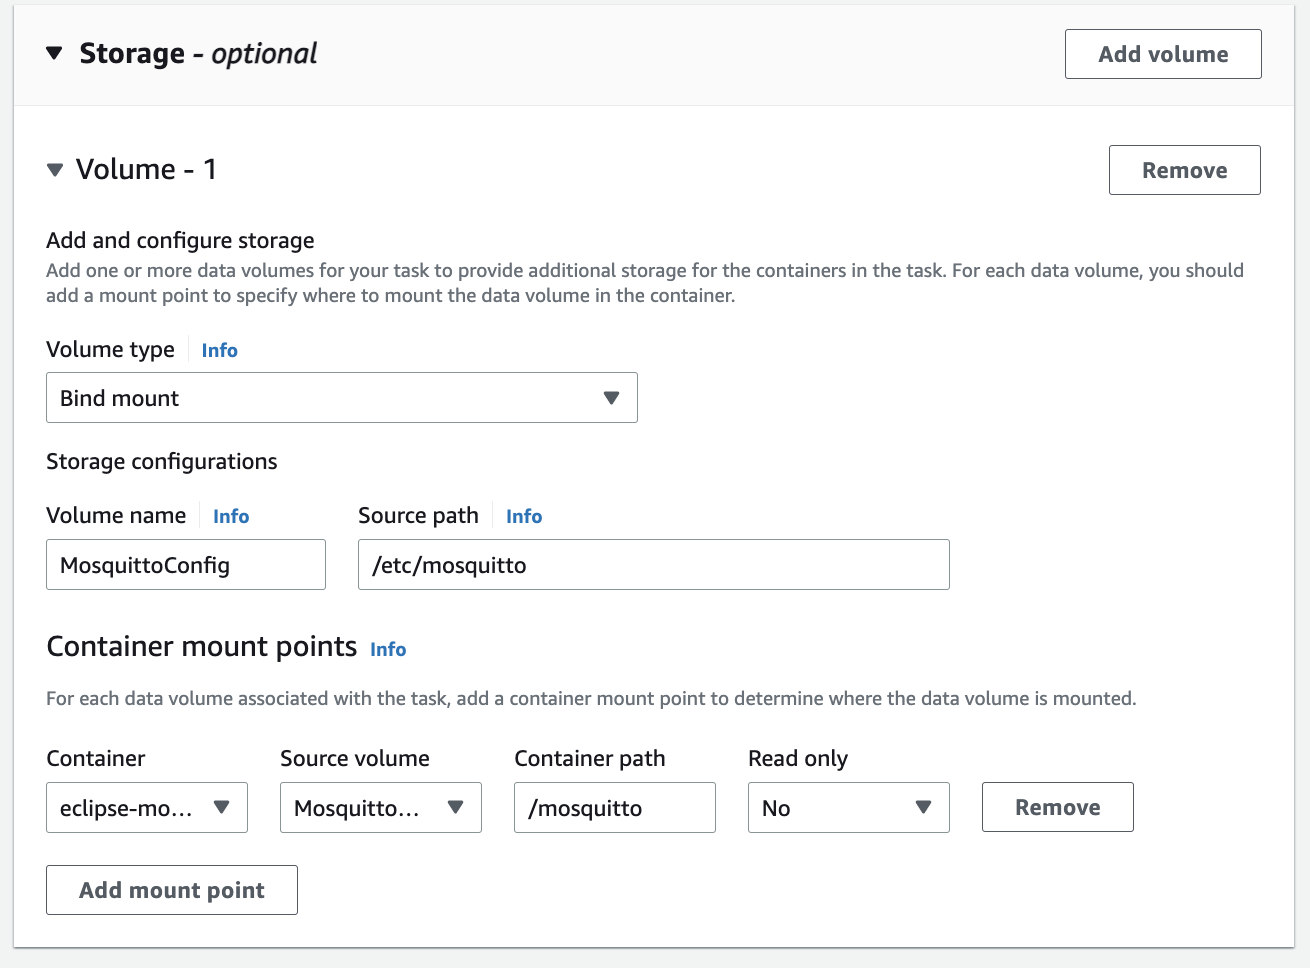
- Under storage under container definition bind a mount point which would bin the path on EC2 machine onto the docker at a specified path
- Optionally, configure environment variables, Instance type EC2 or Fargate, network settings, and logging options as needed.
- Create Task Definition is complete
Step 3 - Configure and Deploy the Task on ECS
- Navigate to your ECS cluster and select the "Tasks" tab.
- Click on "Run new Task" and select the task definition created in the previous step.
- Configure the launch type, network settings, and cluster resources.
- Review the task configuration and click "Run Task" to deploy the MQTT broker on the ECS cluster.
Step 4 - Access and Test the MQTT BrokerStep
- Once the task is running, note the public IP or domain name associated with the container instance.
- Open an MQTT client, such as MQTT.fx or the mosquitto_pub/mosquitto_sub command-line tools, on your local machine.
- Connect to the MQTT broker using the IP/domain and the appropriate port (default is 1883).
- Publish and subscribe to MQTT topics to test the broker's functionality.
- Monitor the logs of the container instance on ECS to troubleshoot any potential issues.
Conclusion:
Deploying Eclipse Mosquitto MQTT Broker on Amazon EC2 Container Service (ECS) allows you to leverage the scalability and management capabilities of AWS for your MQTT-based IoT applications. By following the steps outlined in this blog post, you can quickly set up and deploy an MQTT broker that serves as a robust messaging backbone for your IoT ecosystem. Whether you're building a smart home solution, industrial automation system, or any other IoT project, Eclipse Mosquitto and AWS ECS provide a reliable and scalable platform to enable efficient communication